
Ethylene Propylene Diene Monomer (EPDM) is a high-performance synthetic rubber used extensively across the United States for low-slope and flat roof applications. Whether you are working on a residential porch or a large commercial structure, the success of a rubber roof depends entirely on the precision of the installation process.
Quick Answer: Rubber Roofing Requires Proper Adhesion and Seaming
The integrity of a rubber roof is not found in the membrane itself—which is naturally waterproof—but in the chemical and mechanical bonds created at the seams and edges. A successful installation requires a clean substrate, specific ambient temperatures (usually above 40°F), and meticulous attention to detail during the flashing of penetrations.
Tools and Materials Needed
Before beginning, ensure you have the following professional-grade materials. In the U.S. market, these are typically sourced in “kits” or bulk rolls depending on the square footage.
EPDM Membrane
Standard thicknesses are 45-mil and 60-mil. For high-traffic areas or regions with heavy debris, the 60-mil (roughly the thickness of a quarter) is highly recommended for its superior puncture resistance.
Adhesive
- Bonding Adhesive: A high-strength solvent or water-based glue used to adhere the membrane to the roof deck.
- Splice Adhesive/Primer: Essential for preparing the rubber surface before applying seam tape; it “cleans” and preps the rubber on a molecular level.
Seam Tape
A double-sided, pressure-sensitive tape (usually 3″ or 6″ wide) used to join two sheets of rubber together. This creates a fused, waterproof bond that is stronger than the rubber itself.
Roller and Utility Tools
- Steel Silicone Roller: Used to apply heavy pressure to seams and flashing.
- Weighted Linoleum Roller: Used for the main body of the roof to remove air bubbles.
- Industrial Shears/Utility Knife: For precise trimming.
- Chalk Line: For layout and alignment.
Step-by-Step Rubber Roof Installation
1. Prepare Roof Deck
The substrate must be bone-dry and free of dust, oils, or sharp protrusions. In the U.S., most professionals install ISO (Polyisocyanurate) board or a ½” plywood/OSB deck first. Any moisture trapped under the rubber will turn into steam in the summer sun, causing massive blisters and bond failure.
2. Position Membrane
Unroll the EPDM over the roof area and allow it to “relax” for at least 30 to 45 minutes. This is a critical step; the rubber has “memory” from being tightly rolled and needs to shrink back to its natural state before being glued down. Position the sheet so it hangs over the edges by at least 3 inches.
3. Apply Adhesive
Fold one half of the membrane back onto itself. Apply a thin, even coat of bonding adhesive to both the back of the rubber and the roof deck using a solvent-resistant roller.
- Wait for the “Tack”: Do not lay the rubber down while the glue is wet. Wait until it is tacky to the touch (the “finger-push test”) so that it doesn’t string.
- Roll it out: Carefully fold the rubber back over the deck, avoiding wrinkles. Use a weighted roller to ensure 100% contact.
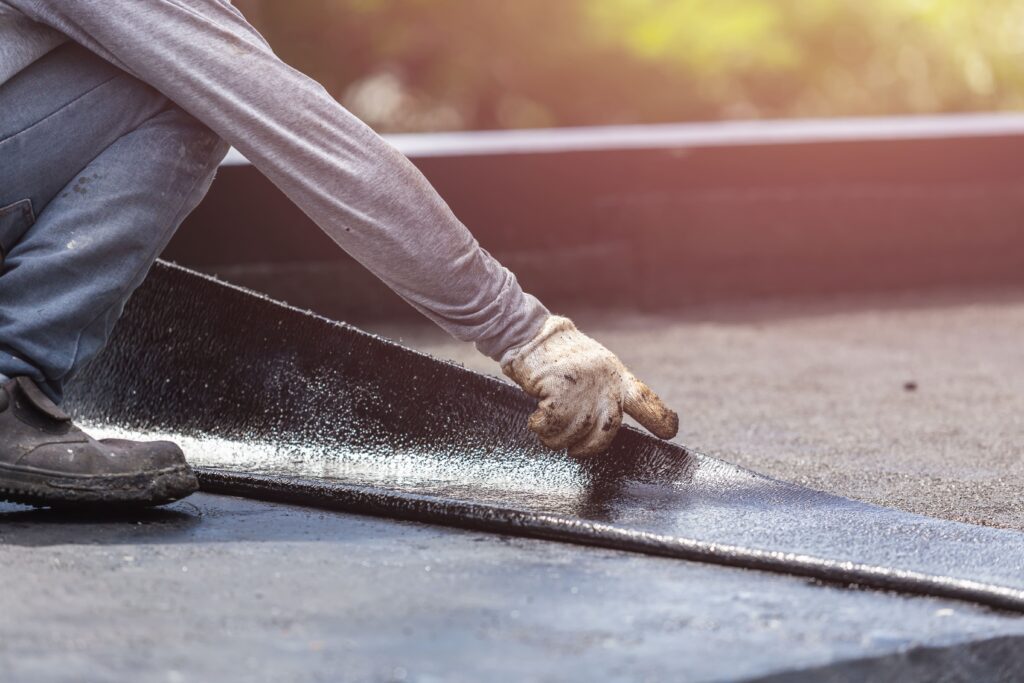
4. Seal Seams
Where two sheets overlap (minimum 3-inch overlap), pull back the top sheet and apply EPDM Primer to both surfaces. Once the primer is tacky, apply the Seam Tape to the bottom sheet. Lay the top sheet over the tape and use a steel hand roller to “marry” the layers. Roll perpendicular to the seam, never parallel, to avoid stretching.
5. Flash Penetrations
Leaks rarely happen in the middle of the roof; they happen at pipes, chimneys, and corners. Use Uncured Flashing Tape for these areas. Unlike the main membrane, uncured rubber is malleable and can be stretched and molded around irregular shapes like “boots” for plumbing vents.
Common Installation Mistakes
Poor Seam Adhesion
The #1 cause of failure is skipping the primer. Simply using adhesive on a seam is insufficient; the primer is necessary to break the factory-applied “dusting agent” (talc) on the rubber. Without it, the seam will fail within 24 months.
Inadequate Drainage Slope
A “flat” roof should never be truly flat. It should have a minimum slope of 1/4 inch per foot. If the installation doesn’t account for a slight taper toward the gutters or scuppers, ponding water will eventually degrade the adhesives.
Skipping Edge Detail
If the rubber is not properly terminated at the edges with a Termination Bar or a Drip Edge, wind uplift can get underneath the membrane. During a North American storm, high winds can literally peel a rubber roof off a building like a sardine can lid.
DIY vs. Professional Installation
While EPDM kits are available at many home improvement stores, the margin for error is slim. A professional installer provides:
- Warranty: Most manufacturers only honor warranties if installed by a certified contractor.
- Safety: Working with large, heavy rolls of rubber on a roof is physically demanding.
- Specialized Tools: The cost of purchasing weighted rollers and industrial heat guns often offsets the “savings” of a DIY job.
FAQs
Can you install EPDM over old roofing?
No. It is highly discouraged to install EPDM over old asphalt shingles or built-up roofing. The oils in asphalt can degrade the rubber, and the uneven surface makes it impossible to get a proper adhesive bond. Always strip the roof to the deck.
How long does installation take?
For a standard residential garage or porch (approx. 500 sq. ft.), a professional crew can typically complete the installation in one day. Larger commercial projects may take several days to a week.
Is rubber roofing good for snow?
Yes. EPDM is excellent for cold climates because it remains flexible down to -40°F. It does not become brittle like asphalt, allowing it to handle the weight and shifting of snow and ice without cracking.
Professional Flat Roof Installation in MA
Ensuring your EPDM roof survives the harsh Massachusetts winters requires local expertise. From the humidity of the summer to the deep freezes of winter, every seam must be perfect. Our team specializes in high-durability EPDM systems tailored specifically for the Bay State’s unique climate challenges.
Ready to secure your property with a leak-proof rubber roof? Click Here to Request Your Free MA Flat Roof Estimate!