
Building a deck is one of the most rewarding home improvement projects, significantly increasing outdoor living space and property value. However, a deck is a permanent structure that must be built safely and correctly to comply with local building standards. This guide walks you through the essential steps, focusing on US residential building practices.
Step 1: Planning Your Deck
The planning stage is critical and involves more than just design; it ensures your project is legal, safe, and financially viable.
Choosing Size and Layout
The size and layout should be proportionate to your home and yard, while also accommodating its intended use.
- Functionality: Consider the furniture you plan to use (e.g., dining sets, grills, hot tubs). A general rule for a dining area is at least 10×12 feet.
- Traffic Flow: Ensure the deck doesn’t block windows or doors and allows for smooth movement between the house and the yard.
- Orientation: Pay attention to sun exposure. A large south-facing deck might require a pergola or shade structure, which should be included in the initial design.
- Height: Determine whether the deck will be attached to the house (raised) or a free-standing ground-level platform.
Permits and Local Building Codes
This is the most critical step. In the United States, virtually all decks require a building permit, especially if they are attached to the house or are more than 30 inches above grade.
- International Residential Code (IRC): Most local codes are based on the IRC, which governs structural requirements, fastener types, load capacities, railing heights, and staircase geometry.
- Submitting Plans: Before beginning construction, submit detailed plans to your local building department. These plans must show the deck’s dimensions, foundation design (footings), framing layout, and connection points to the house.
- Inspections: Be prepared for multiple mandatory inspections: typically, foundation inspection (before pouring concrete), framing inspection (before applying decking), and a final inspection.
Budget Planning
A detailed budget should account for materials, tools, and labor (if hiring a contractor).
- Lumber Costs: Pressure-treated lumber is the most affordable option for the frame, but costs fluctuate. Factor in the cost of specific grades of wood (e.g., No. 1 grade for exposed components).
- Decking Material: Decking material is often the largest cost variable. Composite or exotic hardwoods are significantly more expensive than pressure-treated wood.
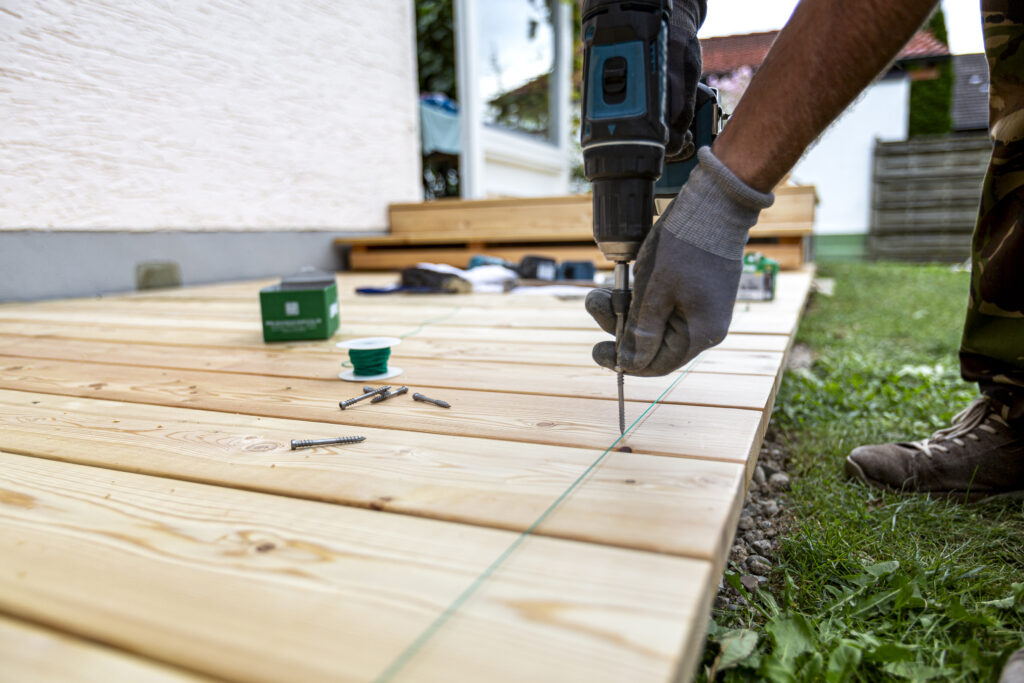
- Fasteners: High-quality, corrosion-resistant fasteners (hot-dipped galvanized or stainless steel) are essential for safety and longevity. Do not use standard screws or nails.
- Hidden Costs: Include costs for permits, foundation concrete, drainage solutions, and tool rentals.
Step 2: Foundation and Framing
The foundation and frame provide the structural integrity and bear the weight of the deck, furniture, and people.
Footings and Posts
Footings are the structural base that transfers the deck’s load to the soil below the frost line.
- Frost Line Depth: Footings must extend below your local frost line (the depth at which ground water freezes) to prevent the deck from heaving or shifting in cold weather.
- Post Size and Material: Typically, 4×4 or 6×6 pressure-treated posts are used. They must be secured to the concrete footings using approved metal post anchors (like bolt-down post bases or standoff bases) to prevent direct contact with the concrete, which can cause premature rot.
- Post-to-Beam Connection: Use approved metal connectors (e.g., structural post-to-beam connectors) and lag screws or carriage bolts to secure the beams to the posts, ensuring lateral stability.
Ledger Board Installation
The ledger board is the piece of lumber that connects an attached deck frame directly to the house. It is the single most critical and most frequently failed element of a deck structure.
- Connection: The ledger must be bolted (not nailed) to the house rim joist using structural lag screws or engineered fasteners (like through-bolts or structural screws) on a specific pattern determined by code.
- Flashing: A continuous, non-corrosive metal or plastic flashing must be installed above the ledger board to direct water away from the connection point, preventing rot and moisture intrusion into the house wall. This is non-negotiable for safety and longevity.
Joist Spacing and Load Requirements
Joists are the horizontal members that support the decking boards.
- Spacing: Joists are typically spaced 16 inches on center (O.C.). This is the standard for most decking materials, but 12 inches O.C. may be required for thinner composite or diagonal decking.
- Load Requirements: Deck framing must be designed to handle a minimum live load (weight of people and furniture) of 40 pounds per square foot (psf) and a dead load (weight of the structure itself) of 10 psf.
- Joist Hangers: Joists must be attached to the ledger board and rim joist using approved metal joist hangers secured with hot-dipped galvanized or stainless steel fasteners, following the manufacturer’s specified nailing schedule.
Step 3: Decking and Railings
These elements define the look and feel of your deck while ensuring accessibility and safety.
Wood vs Composite Decking
The choice of material heavily influences cost, maintenance, and aesthetics.
| Feature | Pressure-Treated Wood | Composite Decking (e.g., PVC/Wood-Plastic) |
| Initial Cost | Low | High (2x to 4x the cost of wood) |
| Durability | Prone to warping, splitting, and rot if not maintained. | Highly resistant to rot, insects, and splitting. |
| Maintenance | Requires annual cleaning, sealing, and staining. | Requires only periodic washing; no staining or sealing needed. |
| Installation | Traditional face-screwing or nailing. | Often installed with hidden fasteners for a seamless look. |
Railing Height and Spacing Rules
Deck railings are a mandatory safety feature for any deck more than 30 inches above grade.
- Height: The minimum railing height for residential decks is typically 36 inches (measured from the deck surface). Local codes may require 42 inches.
- Infill Spacing (Guardrails): The vertical balusters or pickets must be spaced so that a 4-inch sphere cannot pass through any opening. This rule prevents small children from falling through.
- Stair Railings: Handrails are required for stairs with four or more risers. Handrails must be continuous and set at a height of 34 to 38 inches above the stair nosing.
Stair Construction Basics
Deck stairs must be consistent and safe, adhering to strict dimensional requirements.
- Rise and Run: Stair dimensions are tightly regulated. The typical maximum rise (vertical height of a single step) is 7 3/4 inches, and the minimum run (depth of the tread) is 10 inches.
- Consistency: All rises and runs within a single staircase must be consistent within a 3/8-inch tolerance. Inconsistent steps are a major tripping hazard.
- Stringers: The notched structural members (stringers) that support the steps are commonly cut from 2×12 lumber. They must be secured at the deck frame and rest on a proper concrete pad or footing at the bottom.
Step 4: Finishing & Protection
Proper finishing is essential for both aesthetics and long-term protection against the elements.
Sealing and Waterproofing
For natural wood decks, sealing is necessary to prevent weathering, rot, and splintering.
- Wait Time: Pressure-treated lumber must be allowed to dry out before staining or sealing—this can take several weeks or months, depending on climate.
- Products: Use a high-quality deck stain or sealant that contains UV inhibitors to protect against sun damage and hydrophobic properties to repel water.
- Composite Deck Care: While composites are inherently waterproof, they should be cleaned regularly with a composite deck cleaner to prevent mold and mildew growth in the grooves.
Regular Maintenance Planning
A small investment of time each year can drastically extend your deck’s lifespan.
- Annual Cleaning: Pressure wash or scrub the deck annually to remove built-up dirt, mildew, and grime.
- Fastener Checks: Inspect all fasteners, especially the ledger board bolts and joist hanger nails, for signs of corrosion or loosening. Replace any non-approved fasteners immediately.
- Re-sealing: Reapply stain or sealant to wooden decks every two to three years, or as the finish begins to fade or fail.
FAQs
How long does deck construction take?
For a professional crew, a standard 200–300 square foot deck can typically be framed, decked, and completed in 3 to 7 days, assuming good weather. DIY builders should anticipate two to three full weekends of labor, not including the time required for planning, permitting, and inspections.
What material lasts the longest?
PVC Decking (a type of composite) and high-density exotic hardwoods (like Ipe or Cumaru) last the longest. PVC offers superior resistance to moisture and insects and often comes with a 50-year warranty. Exotic hardwoods offer natural resistance without chemical treatments but require periodic oiling to maintain their appearance.
Is DIY deck building safe?
DIY deck building is achievable for homeowners with intermediate to advanced carpentry skills. However, the structural safety components (ledger board, footings, and railing connections) must be done precisely according to local code. If you are unsure about structural engineering or foundation requirements, it is highly recommended to hire a professional contractor or engineer for the framing and foundation steps to ensure safety and pass inspections.
Ready to start your project safely and correctly?
Contact a local certified deck builder or structural engineer today to review your plans and ensure your new outdoor space is built to last and code compliant.